

ChatGPT Ads integration
Connect ChatGPT Ads to Skro, sync ad spend, track campaigns, and send server-side conversions with OpenAI’s Conversions API.
Connect your ChatGPT Ads account to compare ad spend, conversions, and revenue in Skro. You can also manage campaign, ad group, and ad status, edit campaign daily budgets, and change bids on ad groups that use fixed bidding.
Before you begin
- In ChatGPT Ads Manager, open Settings → General → API Keys and create an Advertiser API key for the ad account you want to connect. OpenAI Ads API setup
- If you want Skro to send conversions back to ChatGPT Ads, also create or select a Web data source under Conversions. Copy its Pixel ID and create a Conversions API key for that ad account. You can use server-side reporting with the Pixel ID without installing the OpenAI browser Pixel. OpenAI conversion setup
- In Skro, use an owner or manager account and have a tracking domain ready for the campaign.
Step 1. Connect your ChatGPT Ads account
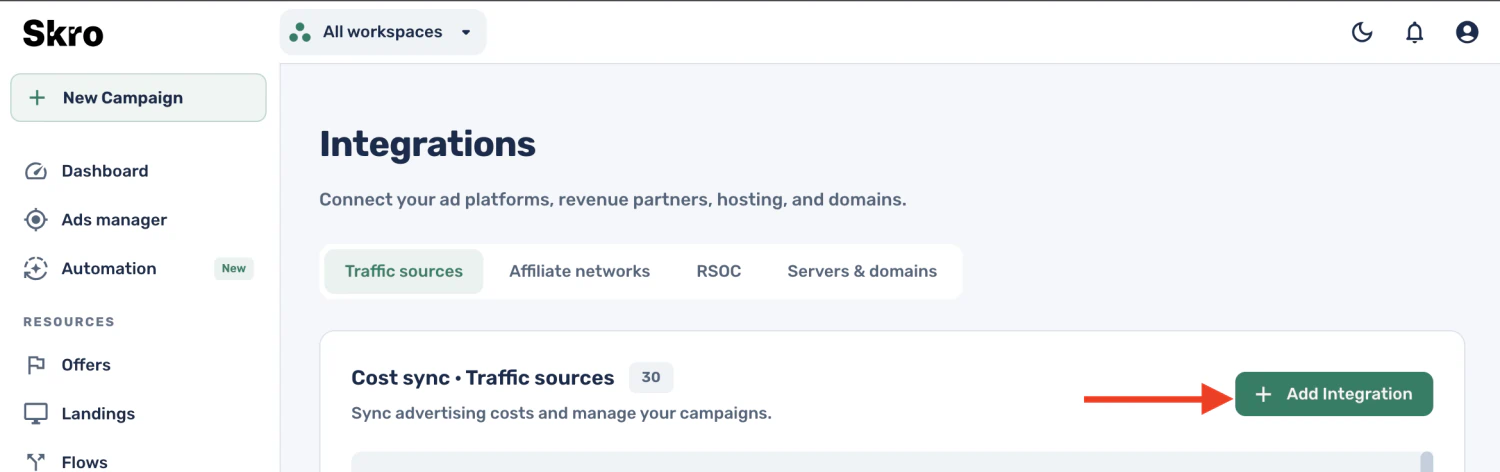
- In Skro, open Integrations → Traffic sources and select Add Integration.
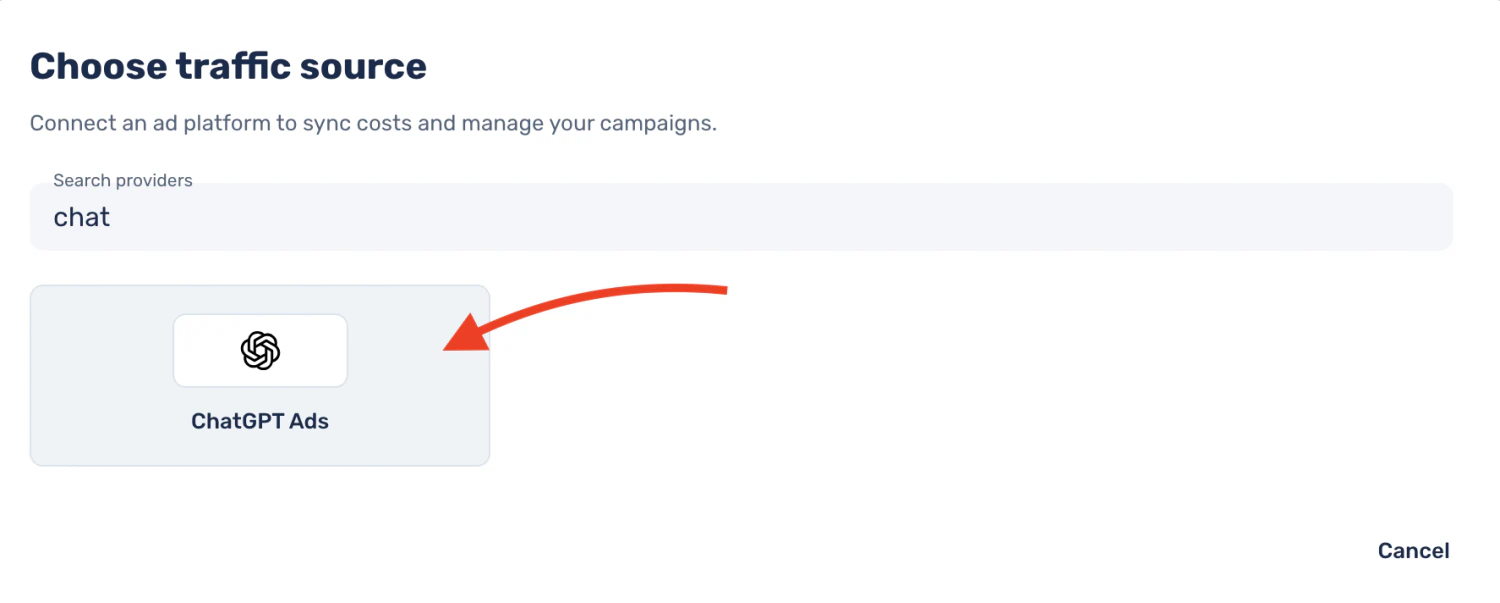
- Search for and select ChatGPT Ads.
-
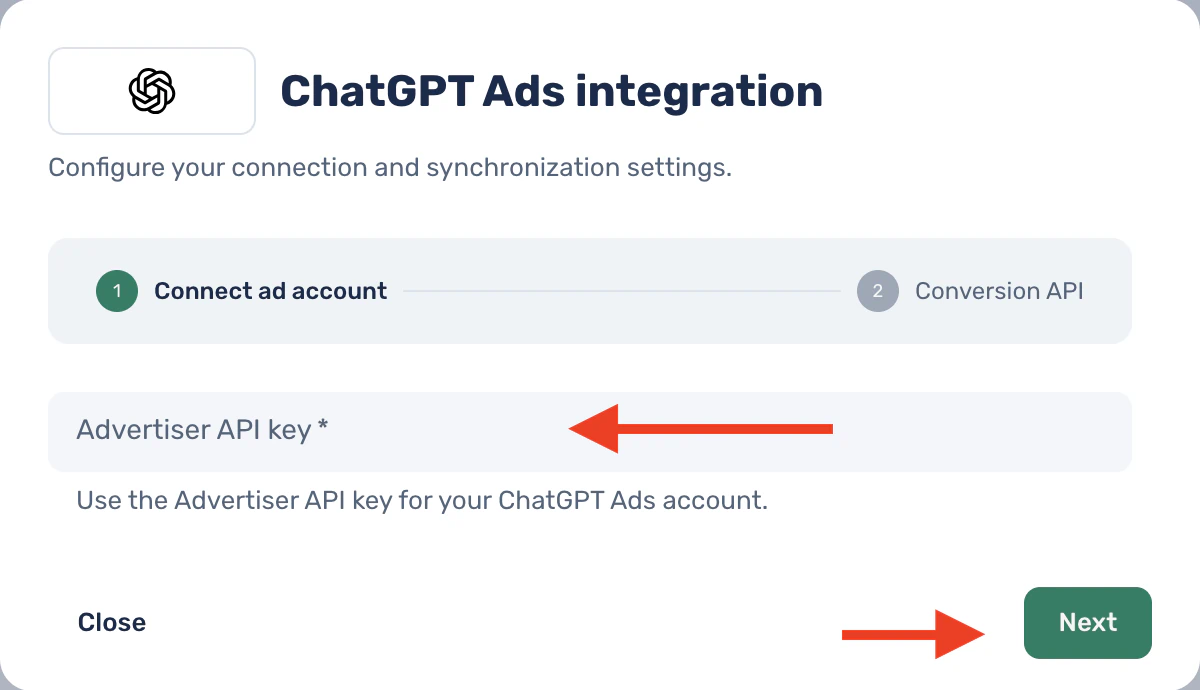
Paste the Advertiser API key and select Next. Verify that Skro shows the intended ad account as Integrated.
-
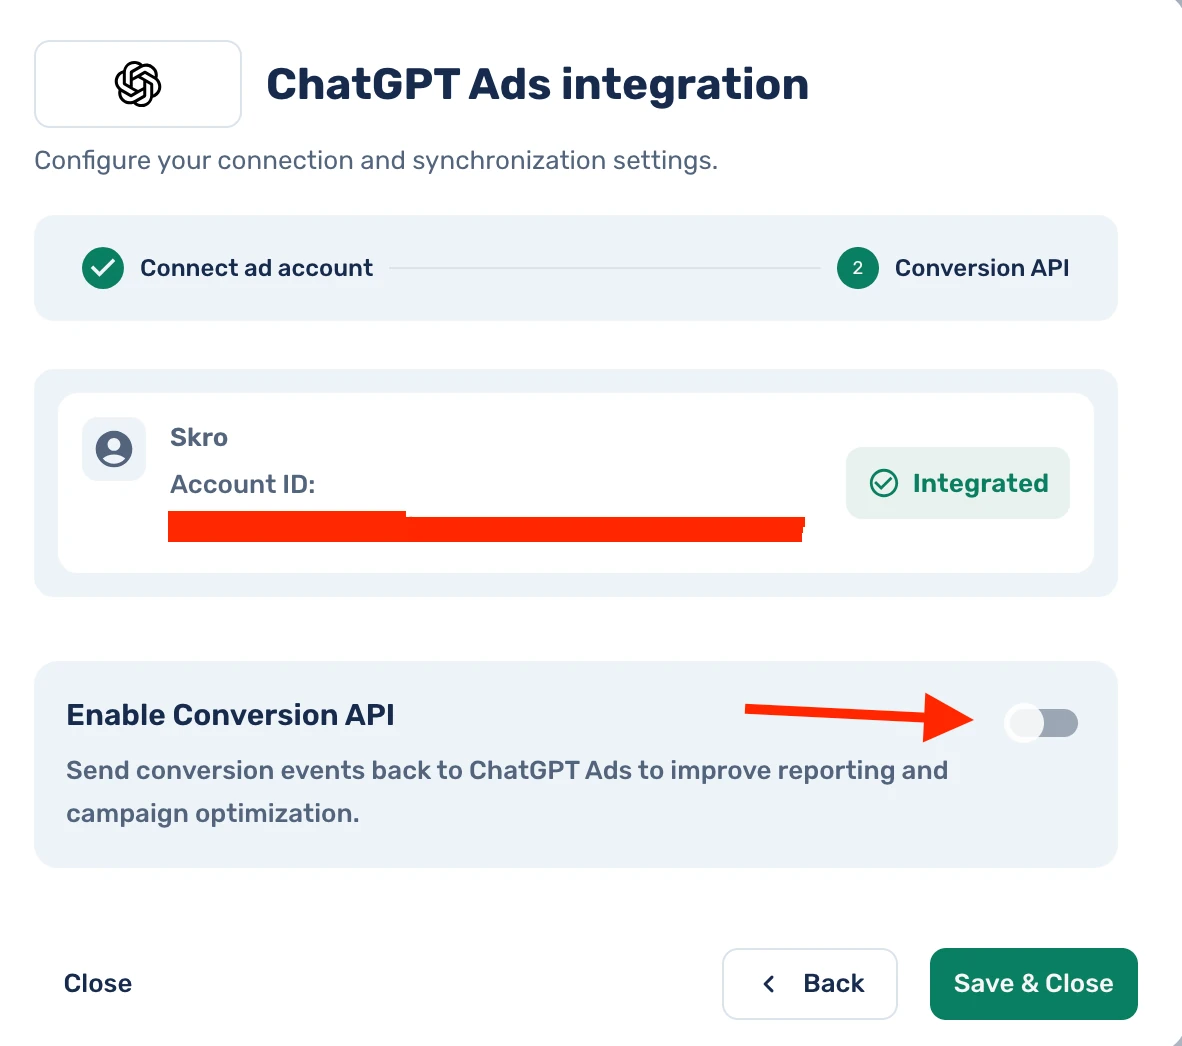
If you only need reporting and campaign controls, leave Enable Conversion API off and select Save & Close. You can enable it later by editing the integration.
Step 2. Configure the Conversions API
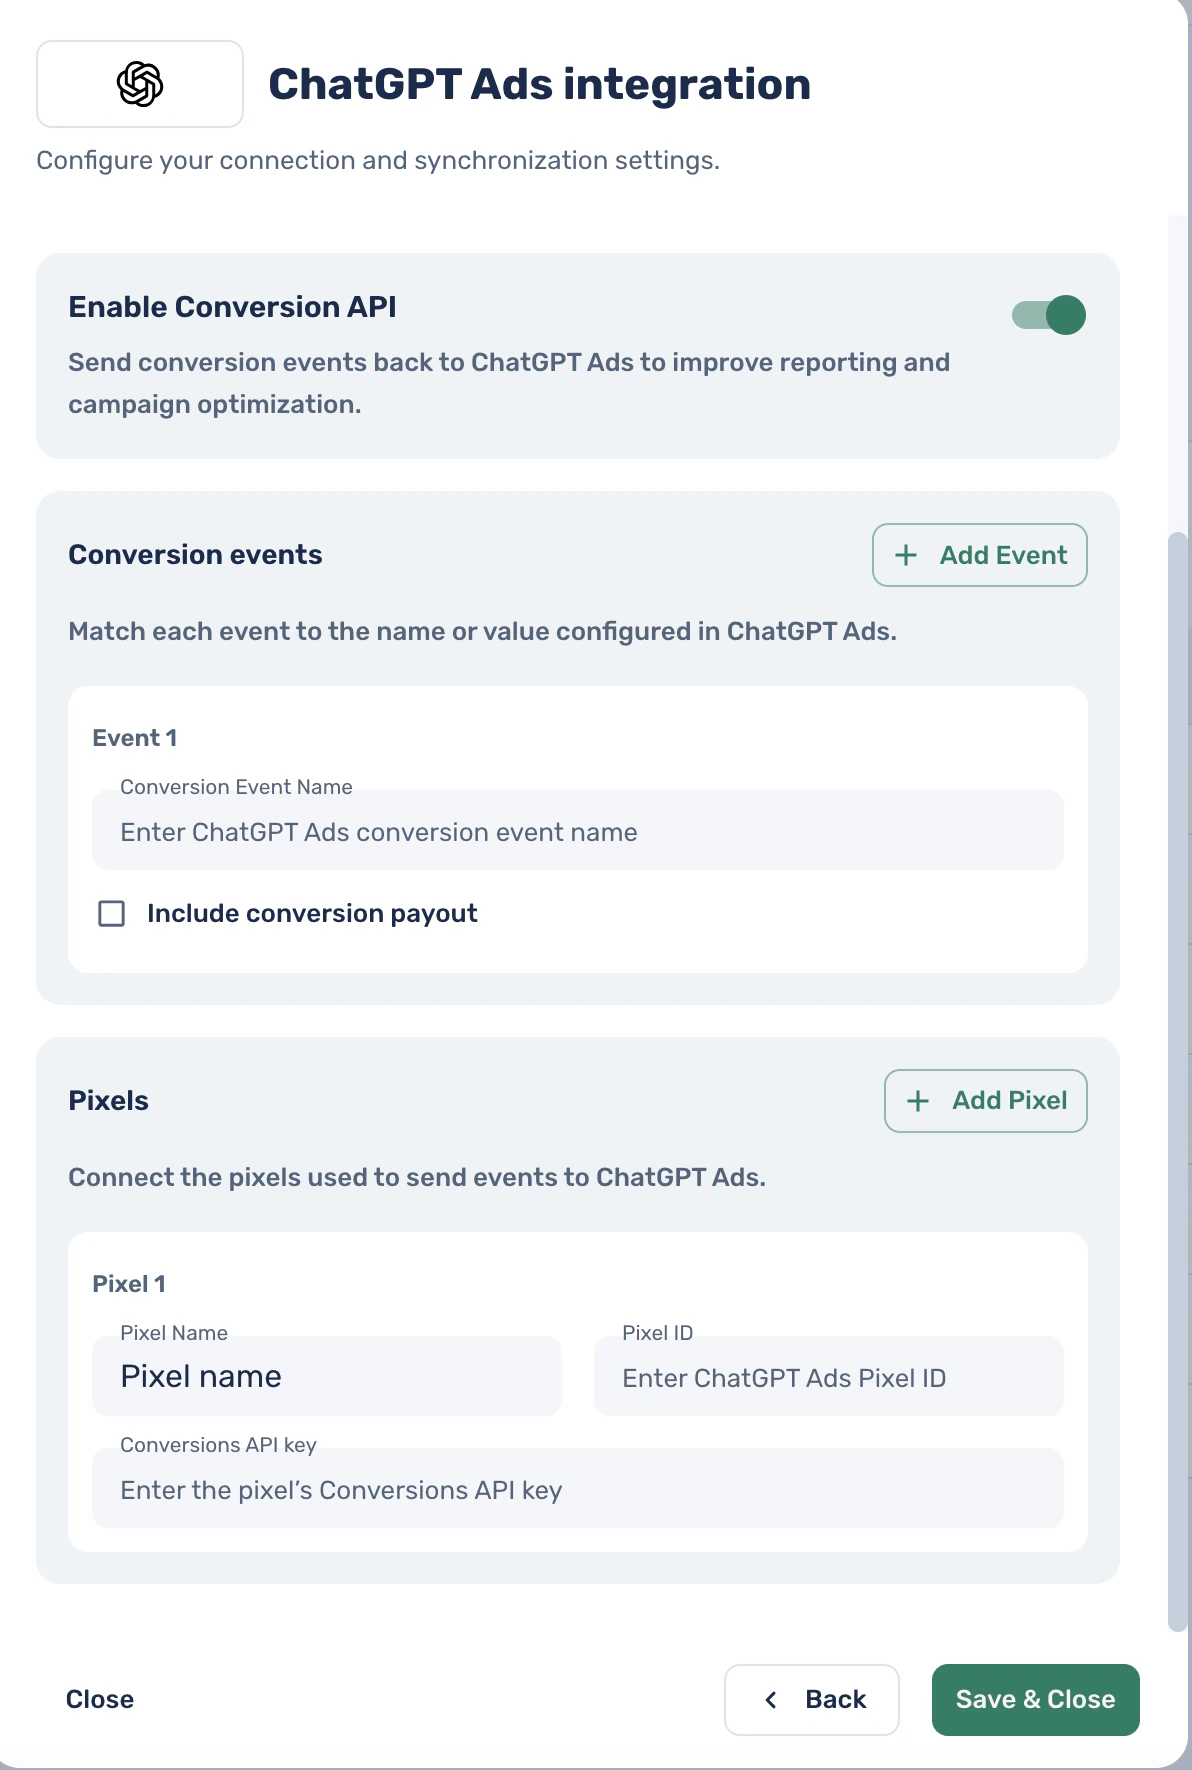
- Turn on Enable Conversion API.
- Under Conversion events, select Add Event and enter the exact event name, such as
order_createdorlead_created. Select Include conversion payout if you want Skro to send the recorded payout and currency with that event. - Under Pixels, enter the Pixel ID and the Conversions API key. Use Pixel Name to distinguish it from other data sources. Add more events or pixels if the account uses them.
- Select Save & Close. If you want Skro to import spend, check that Sync Cost is on for this integration.
Step 3. Create and link the traffic source
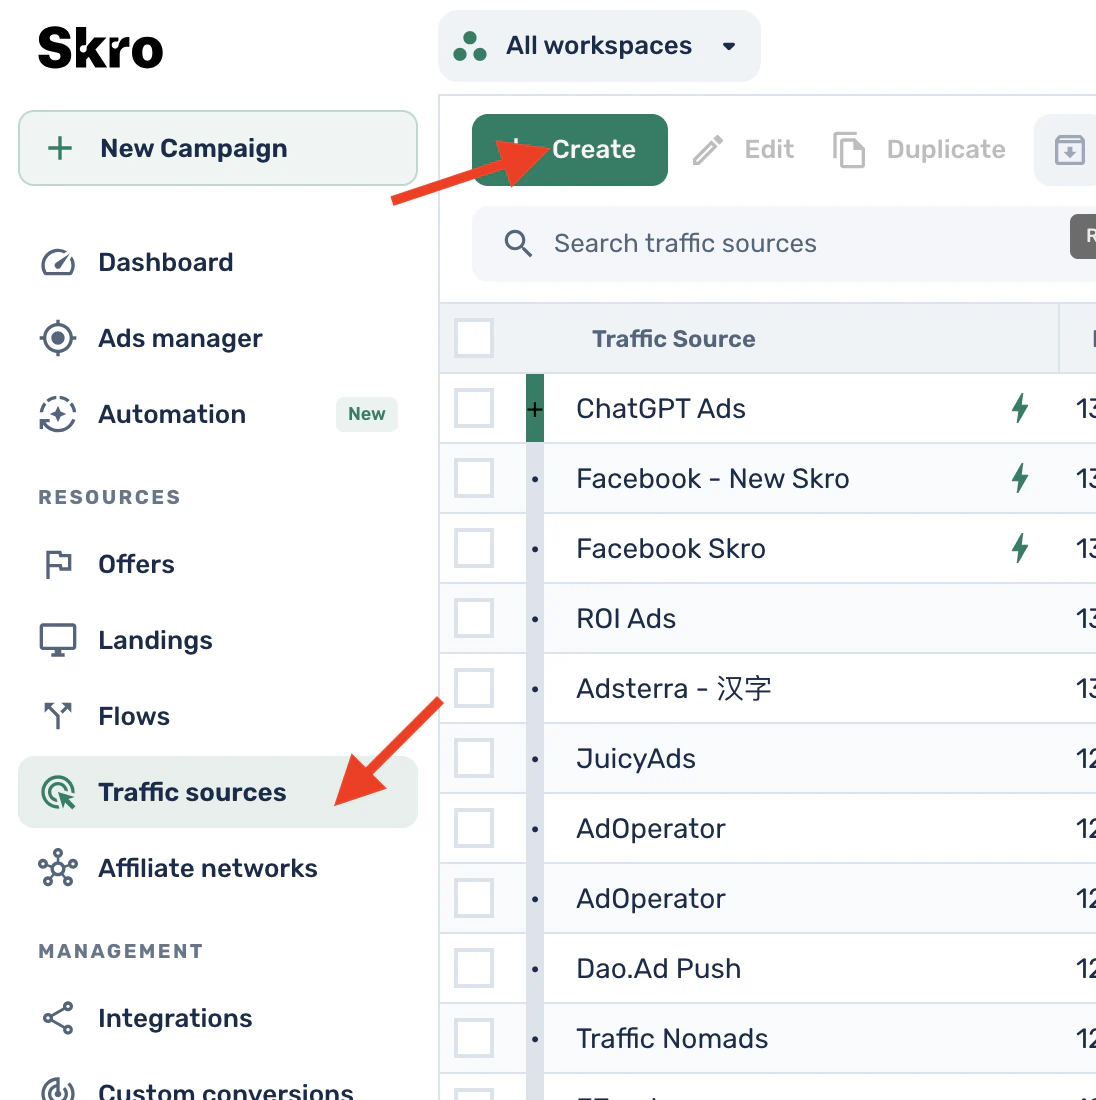
- Go to Traffic sources → Create.
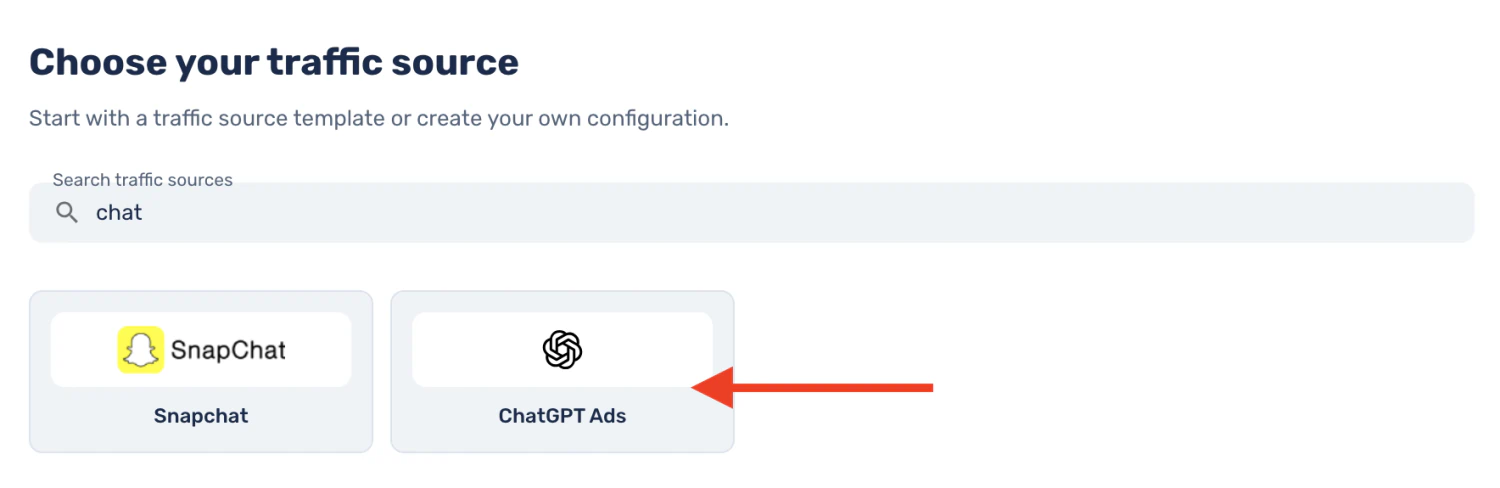
- Search for ChatGPT Ads and select its template.
- Choose the campaign workspace. In Ad account integration, select the ChatGPT Ads account you connected. Leave the generic Enable postback switch off when forwarding conversions through the Conversions API.
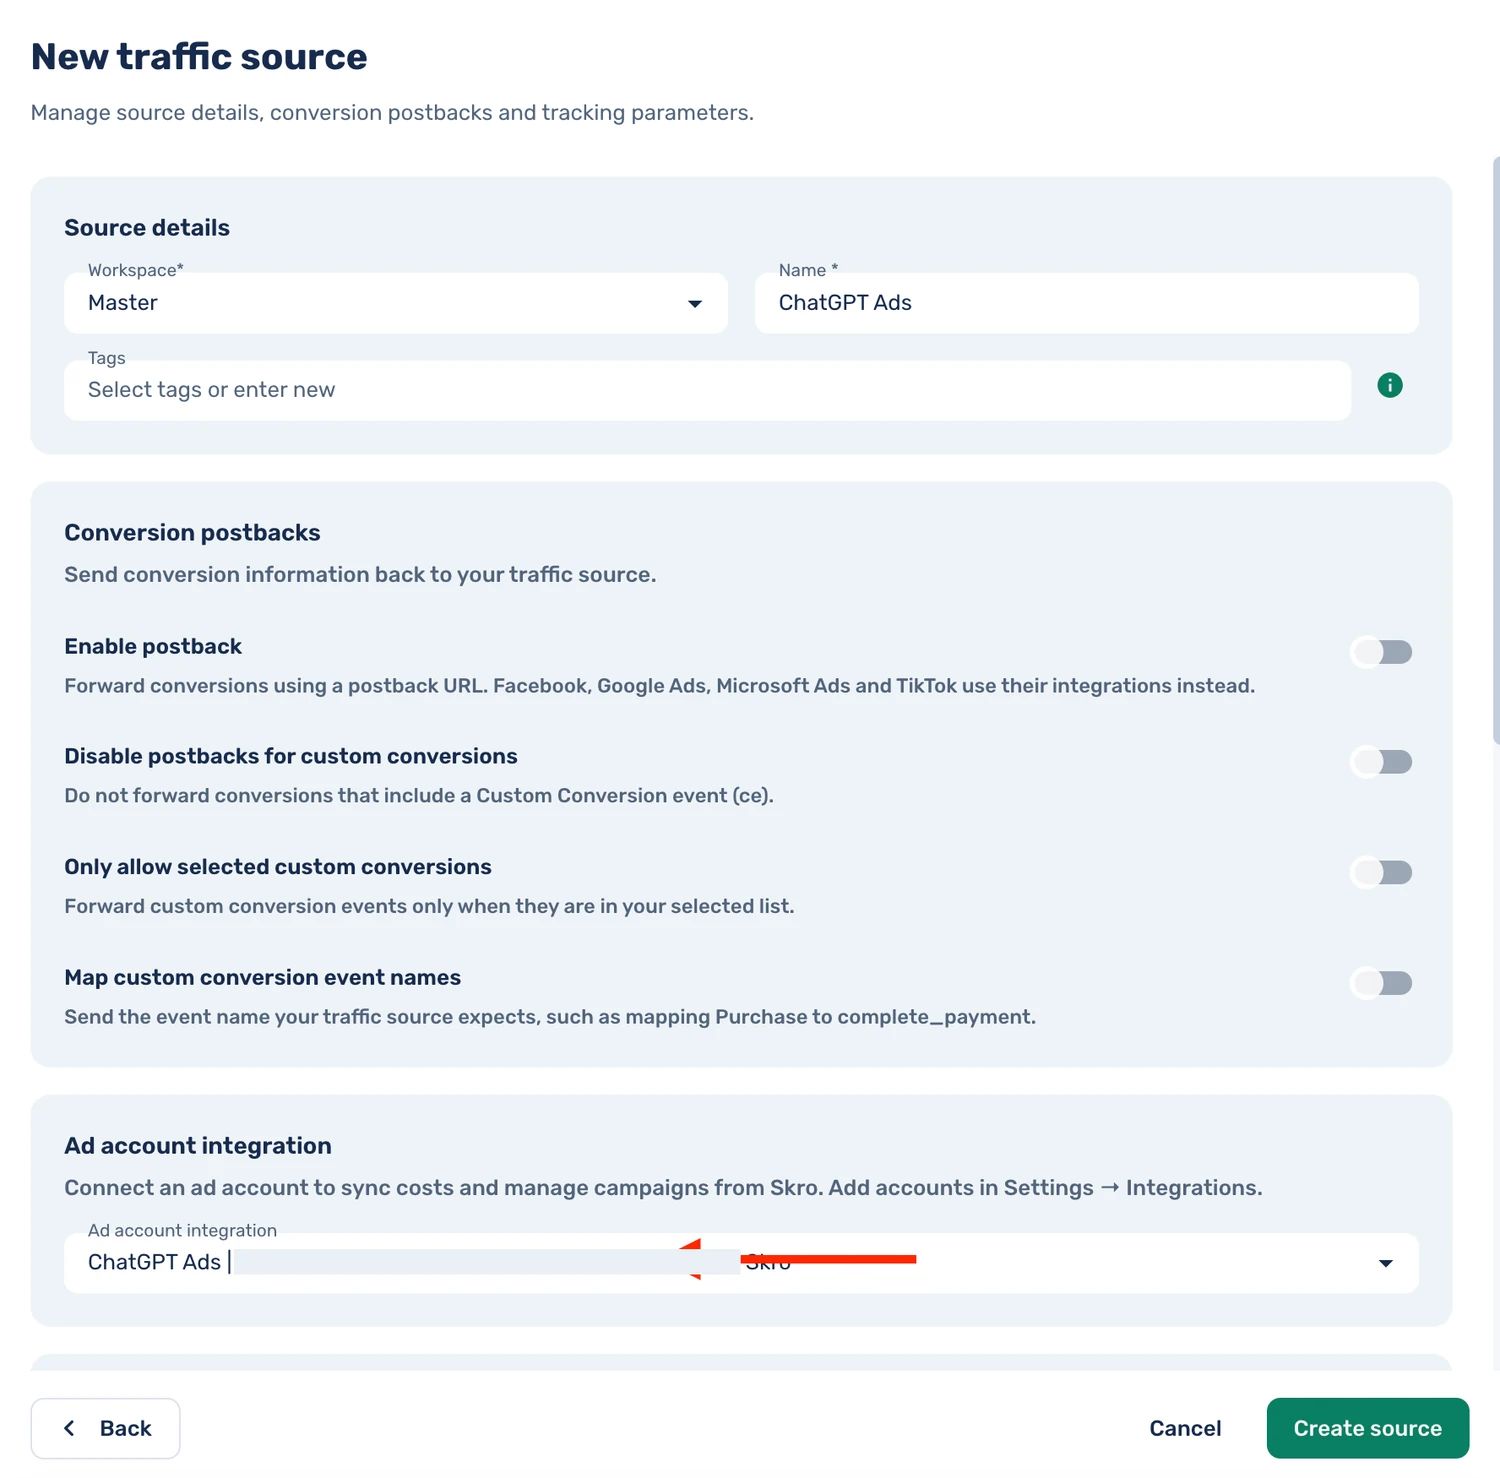
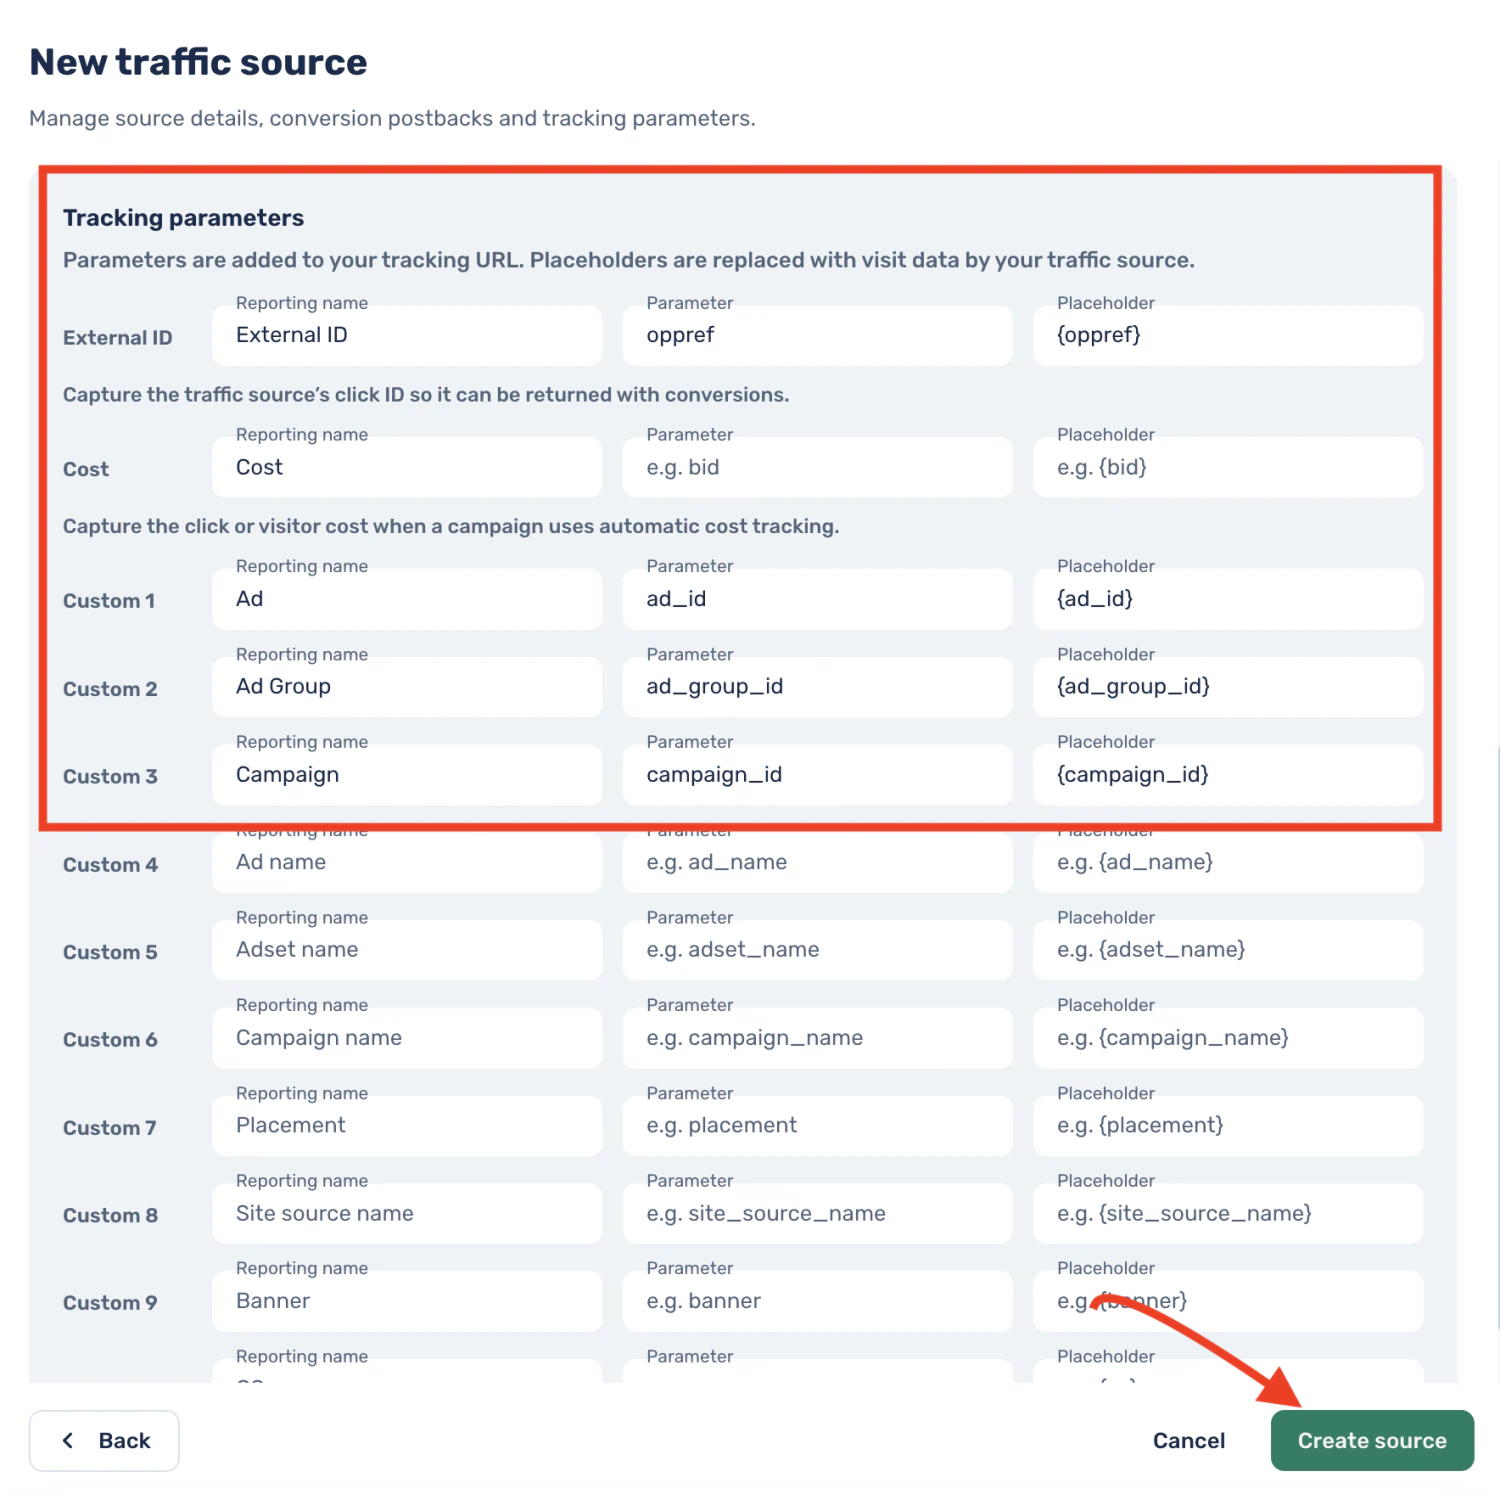
- Review the prefilled tracking parameters and select Create source. Leave the cost parameter blank when importing spend through the connected account.
| Skro field | URL parameter | Template placeholder |
|---|---|---|
| External ID | oppref | {oppref} |
| Custom 1 · Ad | ad_id | {ad_id} |
| Custom 2 · Ad Group | ad_group_id | {ad_group_id} |
| Custom 3 · Campaign | campaign_id | {campaign_id} |
Step 4. Add a landing page and offer
Add a landing page (optional)
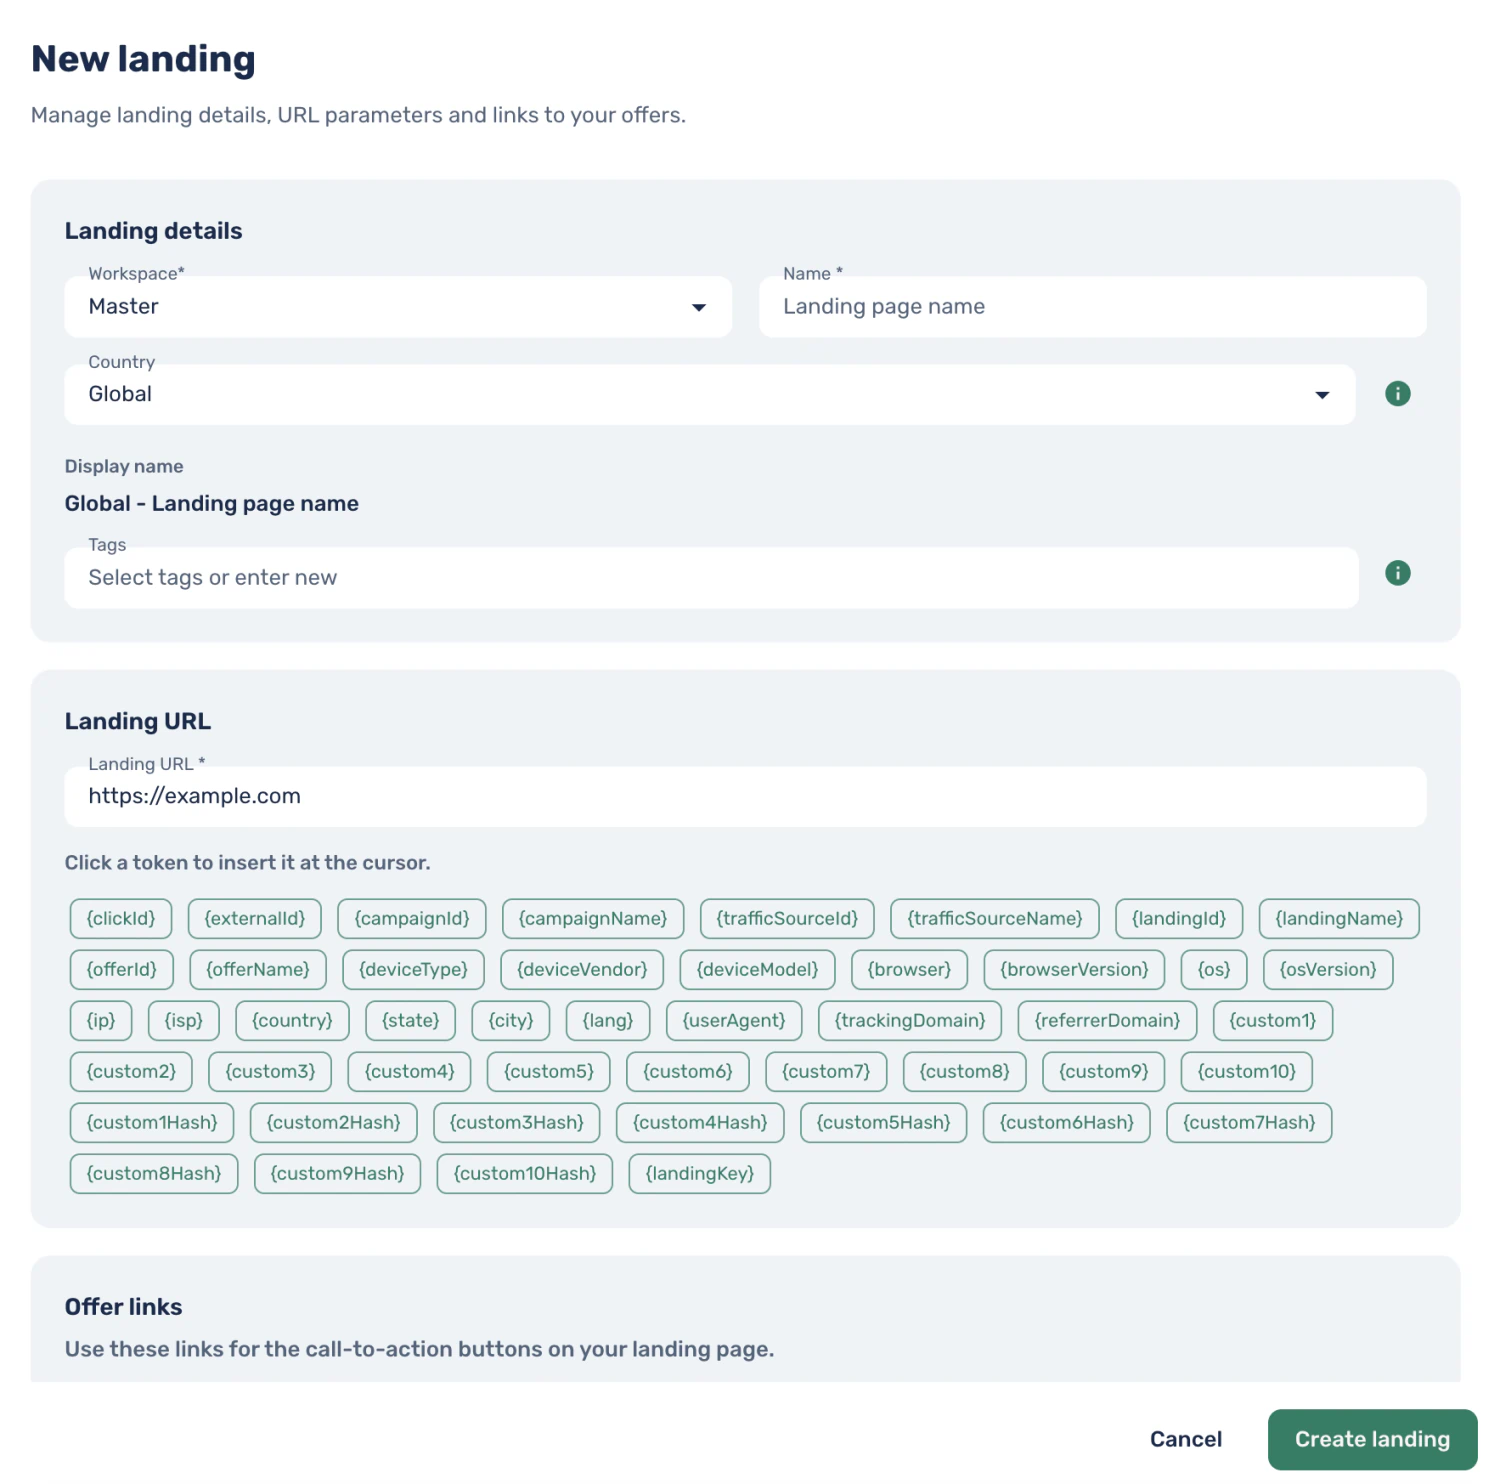
- Go to Landings → Create. Choose your workspace, enter a name, and paste the page address into Landing URL.
- In Offer links, copy the link for your tracking domain. Use it as the destination for the button that leads to your offer. You can also copy the link from Campaign links after creating the campaign.
- Select Create landing. Skip this setup if the ad goes straight to the offer.
Add the offer
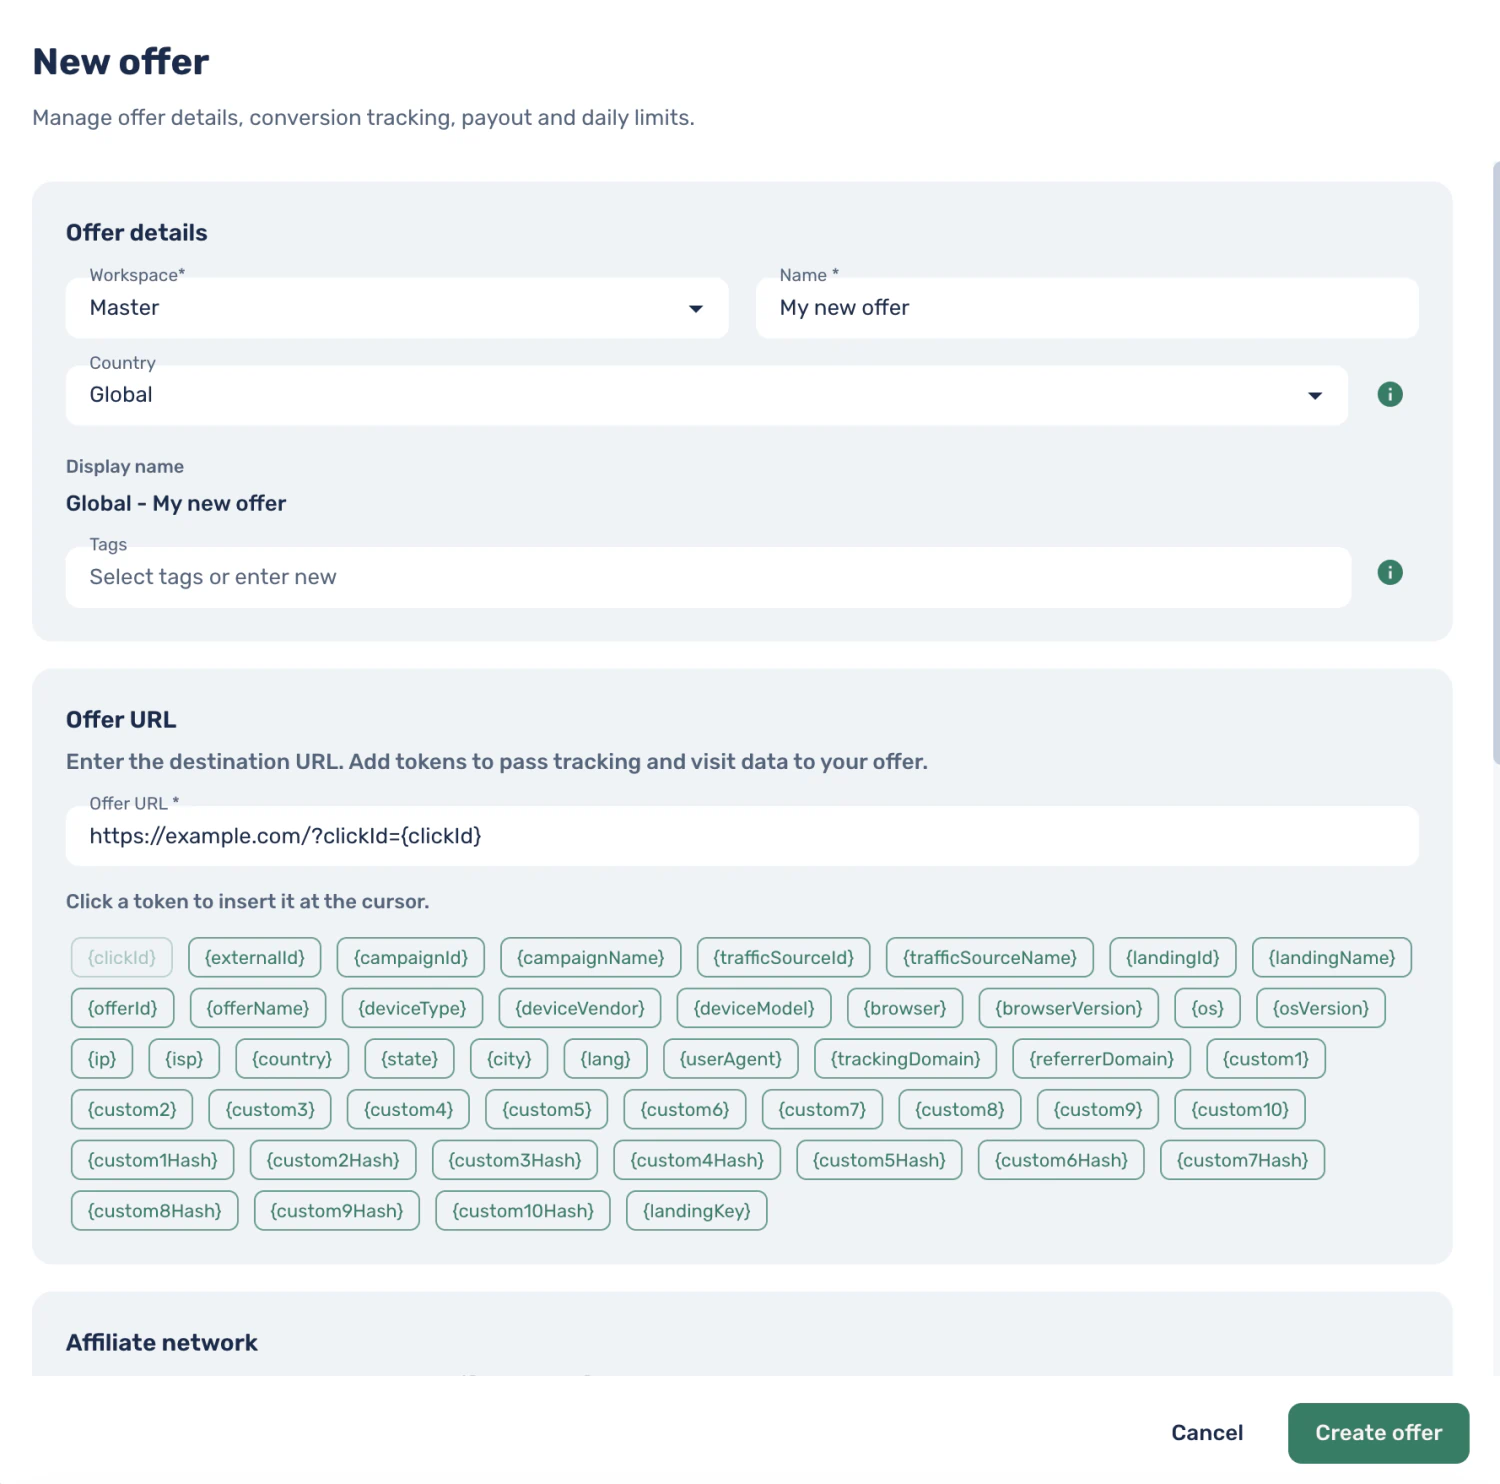
- Go to Offers → Create. Choose your workspace and enter a name and the destination in Offer URL.
- If your website or affiliate network sends a postback, pass the Skro
{clickId}token in the parameter that system expects. For example, usehttps://example.com/?clickId={clickId}if it readsclickId. Select the affiliate network if applicable. - Select Create offer.
Step 5. Create the Skro campaign
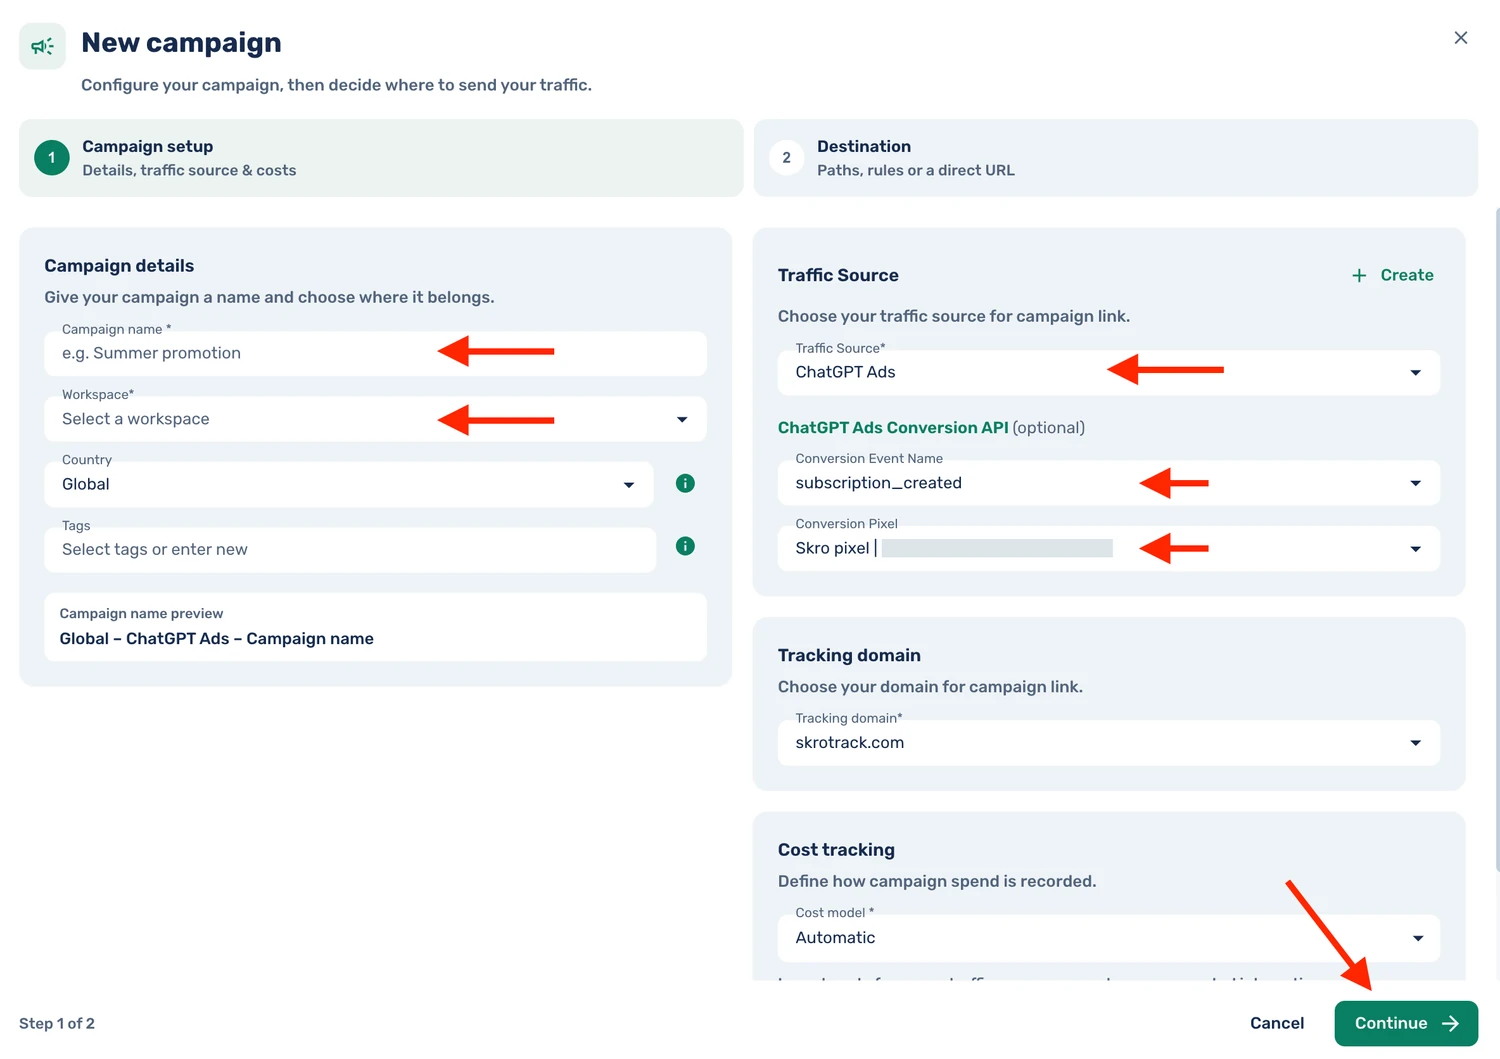
- In Ads manager, select Create or use New Campaign in the sidebar. Enter the campaign name and workspace, then select the linked ChatGPT Ads traffic source and your tracking domain.
- If you enabled the Conversions API, select the Conversion Event Name and Conversion Pixel. The example below uses
subscription_createdfor a new paid subscription. - Select Automatic as the Cost model if you want Skro to import spend. Set the cost currency to match the connected ad account and select Continue.
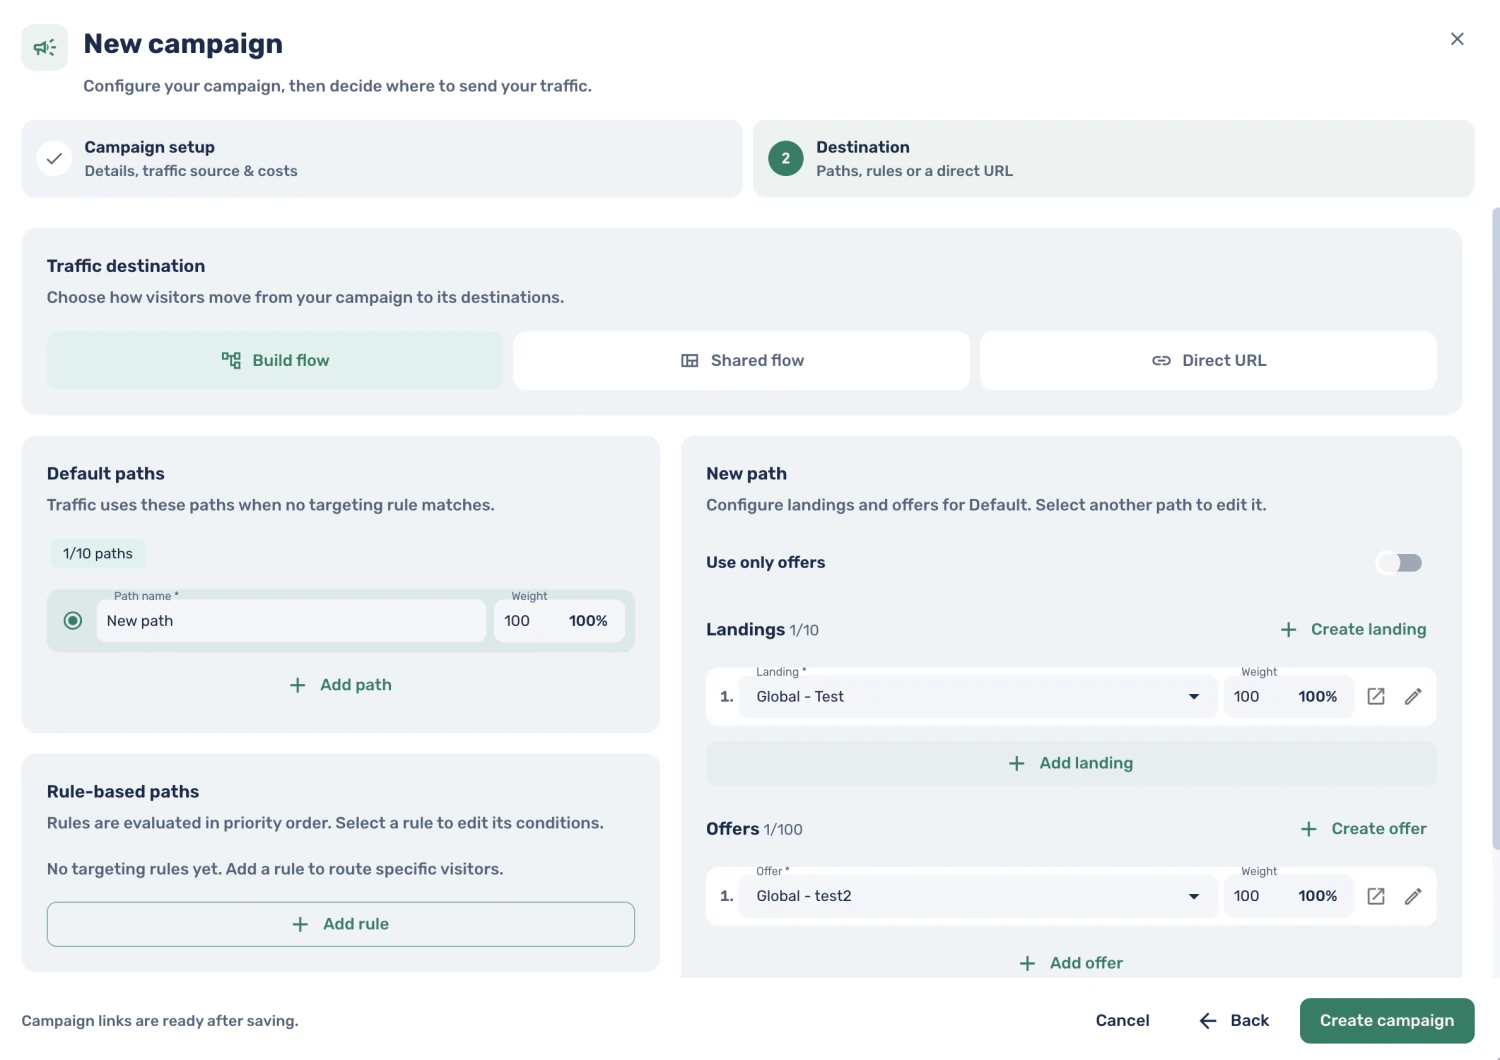
- Under Destination, select Build flow and choose your landing and offer in the default path. If the flow goes straight to the offer, enable Use only offers. Select Create campaign.
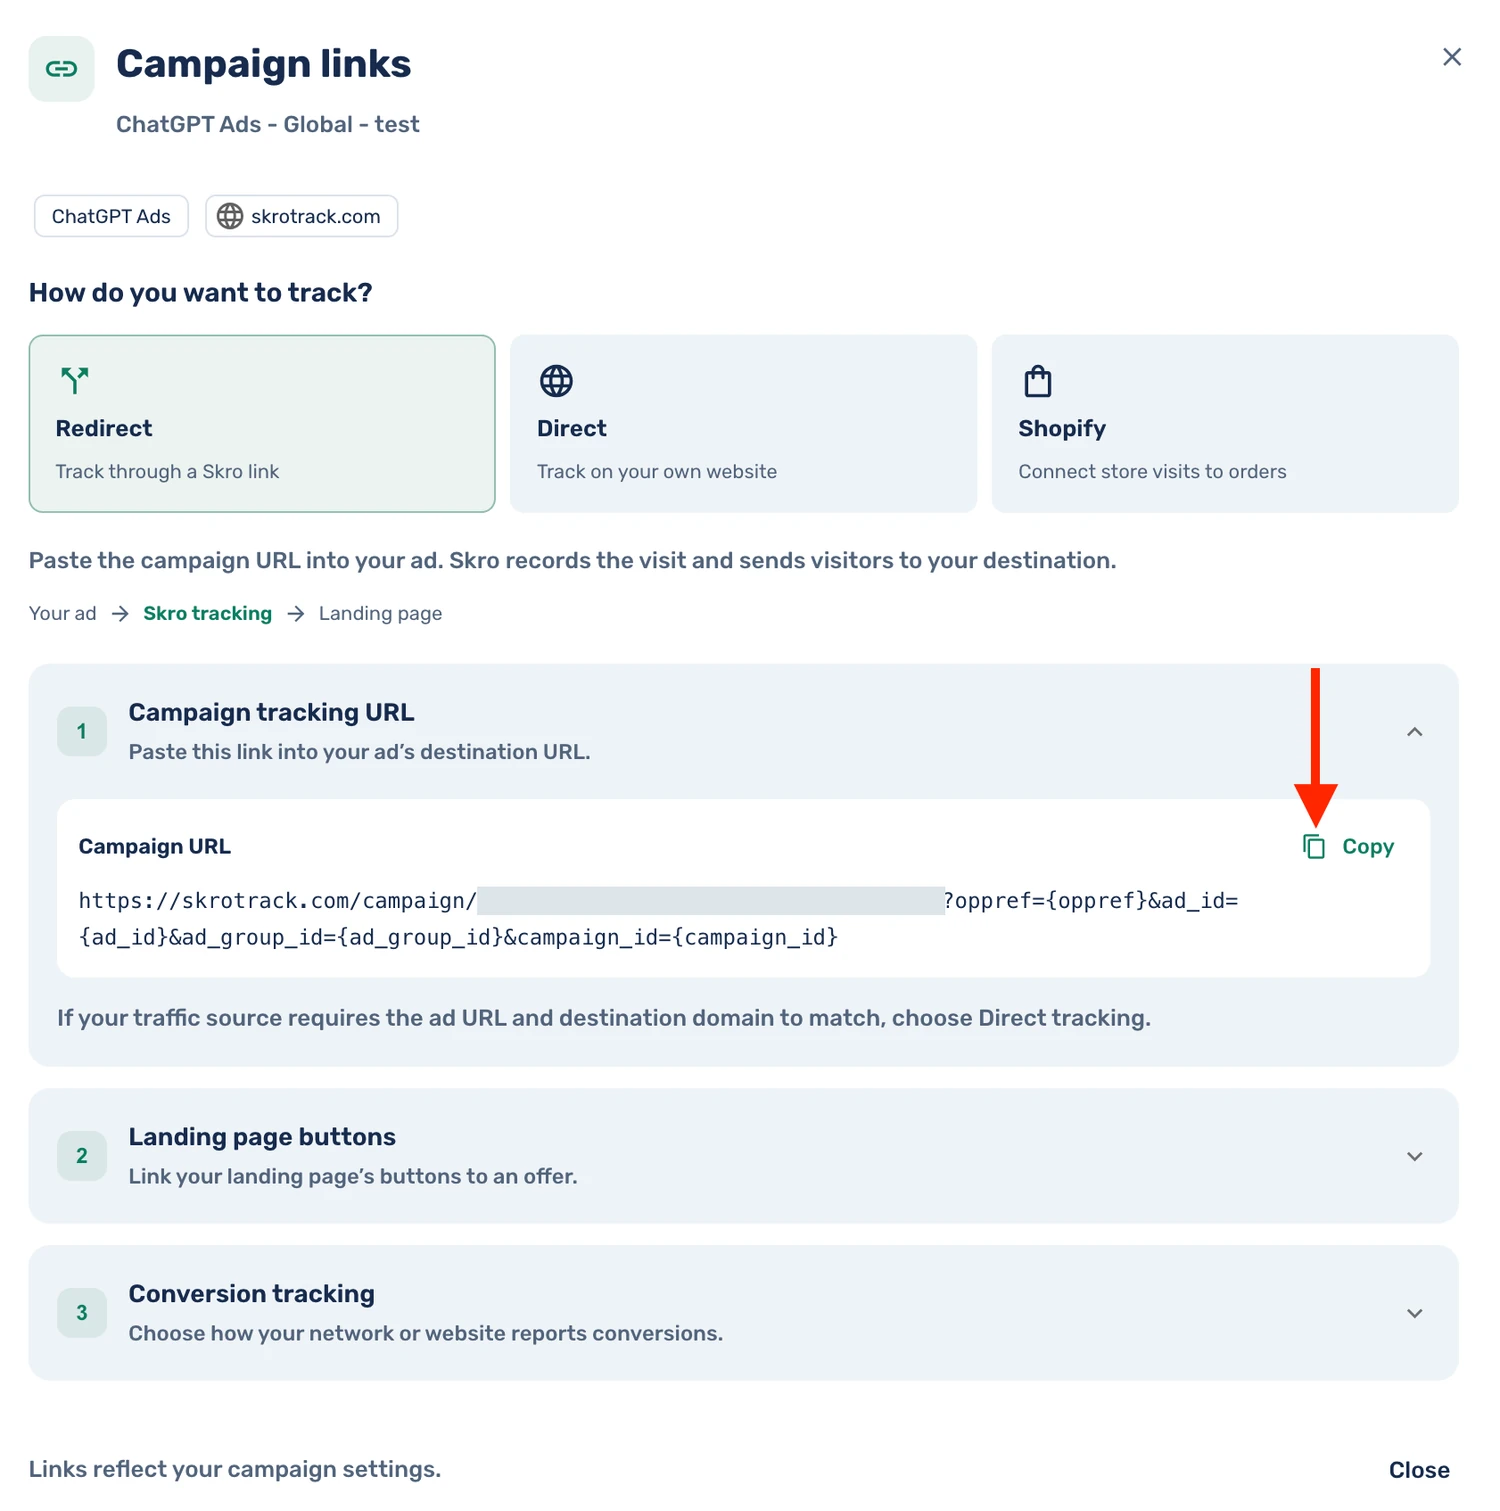
- Open Campaign links. In the redirect flow shown below, copy the Campaign URL. For direct tracking, follow the Direct tab to generate the URL and install the Skro tracking script for your destination.
- Open Conversion tracking and configure your site or affiliate network to report conversions to Skro. For a server-to-server postback, return the saved Skro click ID in
clickIdand the payout when applicable. Skro postback URL parameters
Step 6. Configure your ad and its conversion in ChatGPT Ads Manager
- Set your ad’s destination using the link from Campaign links. Configure the dynamic parameters under Landing page query parameters in the ad editor. If you move a parameter from the copied URL into that field, remove its original pair from the destination URL so each parameter is configured once. Keep the campaign path and any other tracking parameters, including
trckfor direct tracking. OpenAI guidance on dynamic URL parameters
oppref={oppref}&ad_id={ad_id}&ad_group_id={ad_group_id}&campaign_id={campaign_id}- Keep
opprefas the External ID parameter on the Skro traffic source. OpenAI documents{oppref}in its landing-page query string template, so you can useoppref={oppref}there to send the click reference to Skro. Check a delivered ad click to confirm that the incoming value is the actual reference and that each parameter appears once. OpenAI tracking parameter example - In Conversions, configure the event on the same data source and attach it to the ad campaign. For the paid subscription example, use
subscription_createdin both Skro and ChatGPT Ads Manager. OpenAI conversion event setup
Supported conversion events
Enter the exact event name in Skro. For example, use order_created for purchases and items_added for add-to-cart actions. This list covers the standard events Skro can forward through the ChatGPT Ads Conversions API. OpenAI’s event reference
| Event name | When to send it |
|---|---|
page_viewed | A visitor opens a page you measure. |
contents_viewed | A visitor views a specific product, listing, or piece of content. |
items_added | A shopper adds an item to their cart. |
checkout_started | A shopper begins checkout. |
order_created | A shopper completes a purchase. |
lead_created | A prospect submits a lead form or requests contact. |
registration_completed | A visitor completes an account or event signup. |
appointment_scheduled | A prospect books an appointment or demo. |
trial_started | A user starts a trial. |
subscription_created | A customer starts a paid subscription. |
app_installed | A mobile app is installed. |
app_opened | A user opens a mobile app. |
The two app events use the server-side mobile app source. To forward additional actions from the same Skro campaign, create Skro custom conversions and enable Send postback to traffic source for the events you want to forward. Use Map custom conversion event names on the traffic source to map a Skro name such as InitiateCheckout to the standard ChatGPT Ads event checkout_started. Skro’s ChatGPT connector forwards standard event types.
If you also send the same action with the OpenAI browser Pixel, use the same Pixel ID, event name, and event ID in both copies. Pass the browser’s event ID as eventId in the Skro postback. OpenAI’s deduplication guidance
Postback URL parameters for ChatGPT Ads
Your website or affiliate network sends the conversion to Skro. Skro looks up the original click and forwards the eligible event to ChatGPT Ads using the pixel configured on the campaign.
Use the postback URL from Campaign links. Replace SKRO_CLICK_ID with the stored Skro click ID, or with the network macro that returns it. Add the protection token if enabled for the offer’s affiliate network.
https://skrotrack.com/postback?clickId=SKRO_CLICK_ID| What your postback can provide | How Skro uses it |
|---|---|
clickId | Required. Identifies the original Skro visit. Skro looks up the OpenAI click reference from that visit. |
payout, payoutCurrencyCode | Optional revenue amount and its currency. Send the amount in normal currency units, such as 29.00 for US$29. Skro applies the offer’s payout settings and converts the amount to minor units for OpenAI when payout forwarding is enabled. |
ce | Optional Skro custom conversion value, such as InitiateCheckout. Skro can map it to a supported OpenAI event such as checkout_started. Omit it to use the campaign’s selected conversion event. |
eventId | Optional unique ID for the action. Supply the same value as the OpenAI Pixel’s event ID when sending the same action through both channels. |
createdAtUTC | Optional original conversion time in UTC. For a delayed conversion, supply a UTC timestamp such as 2026-11-17%2014%3A30%3A00. |
sourceDomain | Optional source URL or hostname for a web event. Skro removes query strings and fragments before forwarding it. |
email, phone, firstName, lastName | Optional matching data. Send the original values in the server-to-server request when you have permission to share them. Skro normalizes and hashes them before sending them to OpenAI. Include the country code in phone numbers. URL-encode parameter values, including + as %2B. |
zip | Optional postal code. Skro forwards it as a postal code when valid. |
status, transactionId, protectionToken, p1–p5 | Standard Skro fields for conversion status, transaction tracking, postback protection, and extra reporting values. Standard conversions must be approved to be forwarded. Use eventId to control the event identifier sent to OpenAI. |
What Skro sends automatically
| Data | Where it comes from |
|---|---|
| Event name and action source | The campaign’s selected event or the mapped custom conversion. Skro uses the web action source for web events and the mobile app source for app_installed and app_opened. |
| Event ID and timestamp | Skro generates an event ID if you omit eventId. The timestamp comes from Skro’s conversion time, which you can override with createdAtUTC. |
OpenAI click reference (oppref) | The External ID captured from the ad visit. |
| Web source URL | The campaign’s landing, offer, or direct destination URL unless you provide sourceDomain. |
| Click matching data | The visit’s IP address and browser user agent, plus country, city, and region when available. |
| Value and currency | Sent when Include conversion payout is enabled on the selected event, or Include payout in postback is enabled for the Skro custom conversion. Skro sends the converted payout in the account’s base reporting currency. |
For example, a subscription platform could send the original visit ID, first payment, and subscription action ID. With subscription_created selected on the campaign and payout forwarding enabled, Skro sends the subscription event and the recorded value.
https://skrotrack.com/postback?clickId=SKRO_CLICK_ID&payout=29.00&payoutCurrencyCode=USD&eventId=sub_123_first_paymentUse your own tracking domain when applicable. Skro postback reference · OpenAI Conversions API fields
Verify the setup
- Check a visit from a delivered ad in Skro. Confirm that it reached the intended campaign, has a real
oppref, and has resolved campaign, ad group, and ad IDs. Opening the URL manually can verify the route, but a plain browser visit does not supply those ad values. - Complete one test conversion and confirm it appears in Skro. Check the outgoing request under Logs → Postbacks and look for the matching event under Conversions in ChatGPT Ads Manager.
- If OpenAI receives the event but the campaign has no attributed conversion, check the campaign’s selected event, data source, attribution window, and reporting dates. OpenAI conversion troubleshooting
Optimize ChatGPT Ads directly from Skro
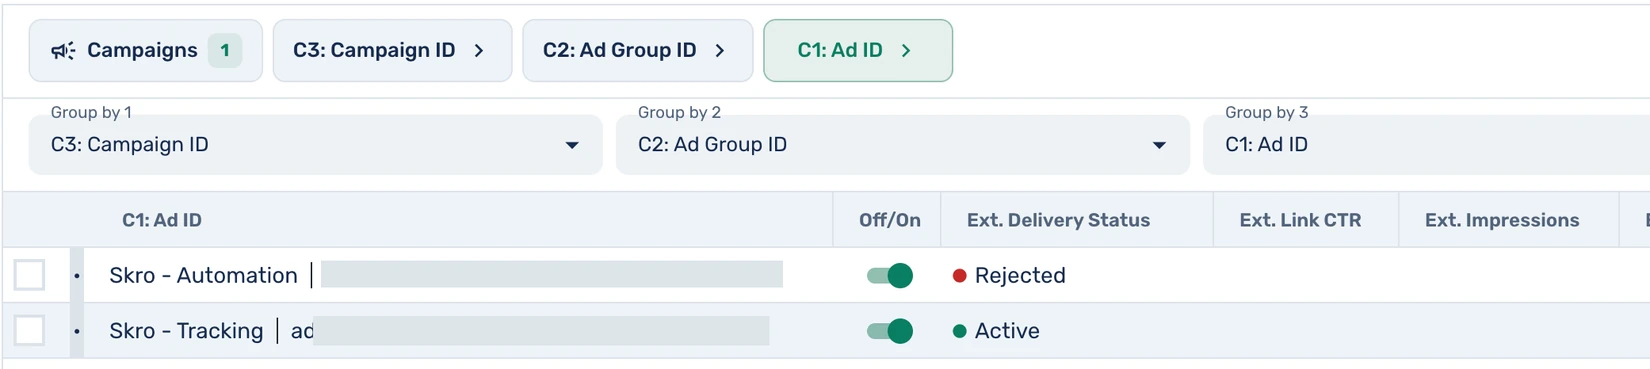
In Ads manager, select the Skro campaign and group the report by C3: Campaign ID, C2: Ad Group ID, and C1: Ad ID. Open the report tab for the level you want to manage. These views use the IDs from the ChatGPT Ads traffic source template.
Campaigns
Use Off/On to pause or enable the campaign. Use the pencil in Ext. Daily Budget to change an eligible campaign’s daily budget in the ad account’s currency.

Ad groups
Use Off/On to pause or enable an ad group. Ext. Bid is editable when the ad group uses fixed bidding and Skro has a bid to display.

Ads
Use Off/On to pause or enable an individual ad. Check Ext. Delivery Status for the status reported by ChatGPT Ads. An enabled ad may still show Rejected if it failed ad review.
Automate ChatGPT Ads in Skro
Open Automation → Create and choose the linked ChatGPT Ads traffic source. Rules can pause or enable campaigns, ad groups, and ads, or send an in-app notification. To change a daily budget, choose Campaigns as the entity type.
Need help with this guide? Contact Skro support.