# System1 Integration
Source: https://skro.eu/docs/integrations/system1-integration
Connect System1 Integration with Skro and configure the identifiers used to synchronize search arbitrage revenue.
## What we do [#what-we-do]
We combine our best-in-class technology & data science to operate one of the world’s most advanced Responsive Acquisition Marketing Platforms (RAMP). RAMP enables us to build powerful brands across multiple consumer verticals, develop & grow our suite of privacy-focused products, and deliver high-intent customers to our advertising partners.
## Integration [#integration]
Skro integration with System1 gives you the ability to sync earnings data that has been adjusted after different traffic sources.
- Update revenue of the previous 2 days once a day.
## Step 1. Add integration [#step-1-add-integration]
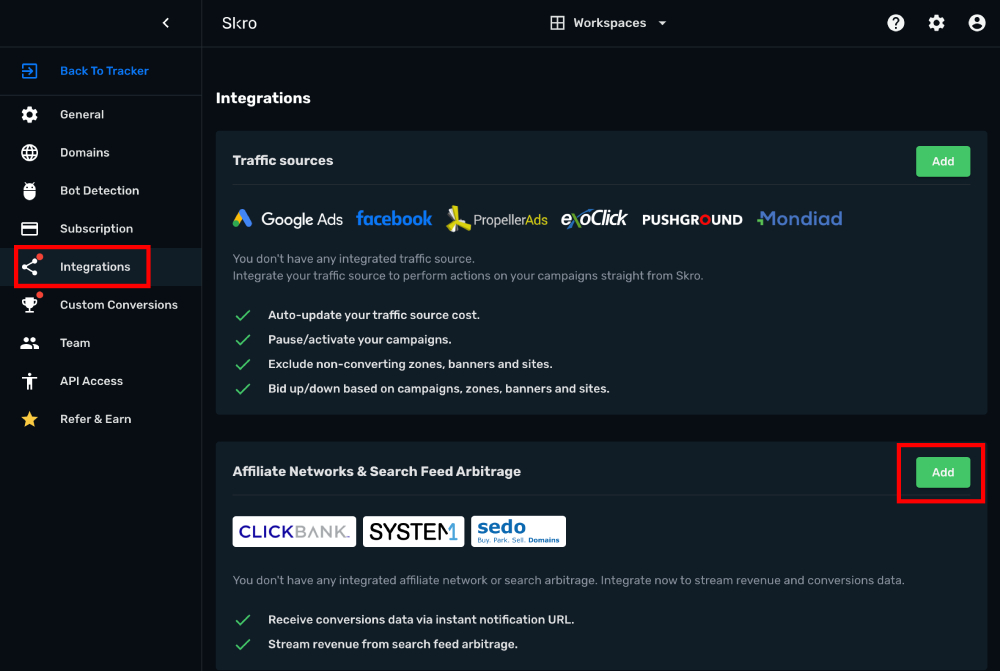
- Log in to your **Skro** account.
- Navigate to **Settings** → **Integrations**.
- Click **Add** in Affiliate Networks & Search Feed Arbitrage section.
- Click **System1** logo.

- **API Key** info you must ask from your System1 account manager or write to System1 support.
- **System1 Account Currency** is the currency of the earnings.
- **Custom Conversion Event** is optional, but you can see a revenue and conversions info in a different columns in your Skro reports.
- **Click ID Param** is the parameter what you use in your offer URL to send Skro Click ID.

- Complete the form and click **Save & Close**
The integration is ready to synchronize earnings data.
## Step 2. Create a Custom Conversions for System1 events. [#step-2-create-a-custom-conversions-for-system1-events]
With custom conversion events feature it is possible to track different types of conversions. For System1 we are going to use 2 different types of conversions: **Search** and **Purchase**.
- Go to **Custom Conversions** [here](https://app.skro.eu/settings/custom-events)
- Click **Create** and add **Search** event.

That postback goes to your offer URL:
`&search_track_url = https://your_tracking_domain/postback?clickId={clickId}&ce=Search`
- Create another event to track revenue (clicks) on your System1 offer page. Create an event name **Purchase**.

That postback goes to your offer URL:
`&click_track_url = https://your_tracking_domain/postback?clickId={clickId}&ce=Purchase`
```text
Note: Always make sure to encode the postback URLs, before appending them to your offer URL. Do not encode Skro click id macro {clickId}
```
## Step 3. How to add System1 offer to Skro? [#step-3-how-to-add-system1-offer-to-skro]
- Go to **Offers**.
- Click **Create** and add your offer URL and fill other fields.
This is an example offer URL which goes to Skro:
```text
http://free-online-courses-us-1.com/?forcekeyA=digital+marketing+online+course&forcekeyB=digital+marketing+degree+online&forcekeyC=how+to+be+successful+in+digital+marketing&forcekeyD=free+online+courses&forcekeyE=digital+marketing+course&sub_id={clickId}&ref=tiktok-{custom7}&rskey=digital+marketing+course&headline=digital+marketing+courses&search_track_url=https%3A%2F%2Fskrotrack.com%2Fpostback%3FclickId%3D{clickId}%26ce%3DSearch&click_track_url=https%3A%2F%2Fskrotrack.com%2Fpostback%3FclickId%3D{clickId}%26ce%3DPurchase
```
Encoded System1 offer URL which goes to System1:
```text
http%3A%2F%2Ffree-online-courses-us-1.com%2F%3FforcekeyA%3Ddigital%2Bmarketing%2Bonline%2Bcourse%26forcekeyB%3Ddigital%2Bmarketing%2Bdegree%2Bonline%26forcekeyC%3Dhow%2Bto%2Bbe%2Bsuccessful%2Bin%2Bdigital%2Bmarketing%26forcekeyD%3Dfree%2Bonline%2Bcourses%26forcekeyE%3Ddigital%2Bmarketing%2Bcourse%26sub_id%3D%7BclickId%7D%26ref%3Dtiktok-%7Bcustom7%7D%26rskey%3Ddigital%2Bmarketing%2Bcourse%26headline%3Ddigital%2Bmarketing%2Bcourses%26search_track_url%3Dhttps%253A%252F%252Fskrotrack.com%252Fpostback%253FclickId%253D%7BclickId%7D%2526ce%253DSearch%26click_track_url%3Dhttps%253A%252F%252Fskrotrack.com%252Fpostback%253FclickId%253D%7BclickId%7D%2526ce%253DPurchase
```
## Verify the setup [#verify-the-setup]
Confirm that the offer identifiers match the values in your integration. After the next revenue synchronization, compare the same date range and currency in Skro and your provider account.
If data is missing, check the selected workspace, integration, campaign, and reporting date range. Compare parameter names and macro values with the examples in this guide before repeating the test.
## Related guides [#related-guides]